Cold Brew at Home
Our resident coffee expert, Matthew knows a thing or two about how to get your caffeine fix even when the temperatures are rising up into the 90s. We asked him to share his wealth of knowledge with us. Take it away Matthew!
“The last day of school. The first day at the beach. Freeing your legs from the cloth prisons known as pants. Sweating through your shirt on the subway platform. Each of these small moments herald the inevitable shift from spring to summer here in NYC. There’s one other such transitional moment: the switch from hot to iced coffee.
Unless you prefer the acrid taste of hot-brewed coffee poured over ice, cold-brew coffee is the only way to go when the weather gets sweltering. In fact, some coffee drinkers love the smooth, rich, and chocolatey mouthfeel of cold brew so much they’ll drink even when there’s a foot of snow on the ground. Unfortunately, the average cold-brew these days will often set you back $4 to $6, depending on how pretentious the coffee shop is. And though you can find bottled cold-brew concentrate at just about every grocery store and bodega now, why not cut out the middle man and cold-brew at home? The process is shockingly simple and practically idiot-proof, and your kitchen might already have all the tools you need.
Cold-brew coffee begins with coarse ground coffee beans, the same as you’d grind for a French press. You then steep the coffee in room temperature water on your counter for 24 hours, at which point you strain out the grounds and voila, cold-brew concentrate! Due to the length of the steeping process, fine ground coffee can turn the final product too bitter and harsh, as well as being more difficult to strain out, and so coarse ground coffee is a necessity. You can do this at home with a blade or burr grinder, or you can ask to have them ground for you at your local coffee shop or a supermarket. You can use any roast, origin, and process of coffee for cold brew, so you can either stick with your favorite go-to or experiment with whatever strikes your fancy.
Once you have your coarse ground coffee, the next step is to find a vessel for the 24-hour steeping period. The most important feature is a cover, as you don’t want the coffee to get stale during the steeping process. As far as material goes, glass and plastic are the way to go, as they don’t absorb any odors or oil and won’t affect the flavor of the final product. Canning jars from Ball are a great option, and their wide variety of sizes accommodates any size of cold-brew habit. The ratio of coffee to water is roughly 1:4 by volume or 1:3 by weight; for example, 1 (10oz) cup of coffee to 4 cups (32oz) of water. When adding the water, it’s important to pour slowly and fully saturate the grounds in order to extract maximum flavor.
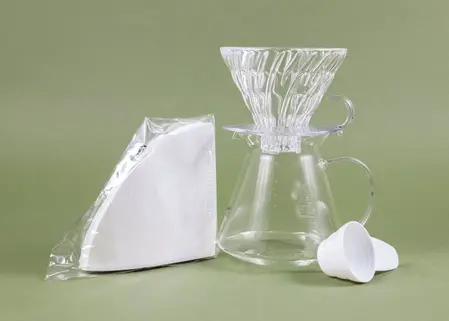
Finally, the last element you need before adding water to coffee is a method for straining the coffee grounds out of the water after steeping. You can use a double-mesh strainer or a paper or metal pourover coffee filter and simply pour the coffee from one canning jar to another through your strainer/filter of choice. For even easier extraction process, you can fill a fine-mesh fabric nut milk back like the ones we carry from Harold Import Company with the coffee grounds, immerse it in the proper amount of water (holding under for a minute or two to ensure maximum saturation), and simply pull the bag out the water after the steeping process is complete.
Though you can easy set up a cold-brew apparatus from a few simple tools and containers, there’s also a variety of cold-brewing systems designed specifically to handle every step of the process. Any french press can be used for cold brew; simply leave the plunger up during steeping and press to extract, making sure to seal the spout with plastic wrap if the lid does not fully seal the spout. A reusable cotton filter creates a lighter, more nuanced coffee. For the metal filter crowd, our Ovalware cold brew maker uses a built-in metal basket filter that easily removes the grounds after steeping. It also boasts a slender glass carafe that takes up a minimum of fridge space.
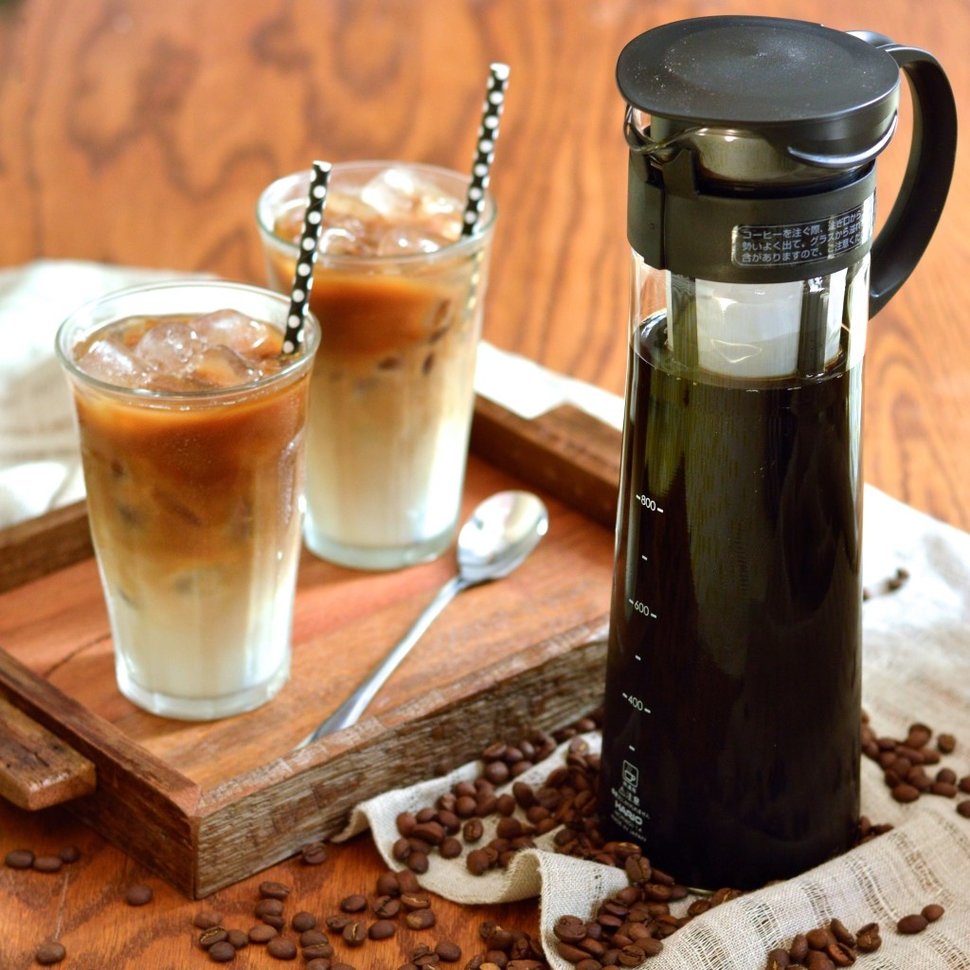
Now that you have your cold-brew concentrate, all you need to do is pour over ice and enjoy! The finished concentrate can keep in a sealed container (canning jars are excellent for this) for up to two weeks. And yes, the concentrate is quite a bit more caffeinated than hot coffee, so you might prefer to dilute it with water or milk at a 1:1 or 1:2 ratio. Or, if you’re a hardcore caffeine addict, you can just drink the concentrate straight up. Don’t worry, we won’t judge.”
Leave a comment
Recent articles
View all
Knife Sharpening at Whisk